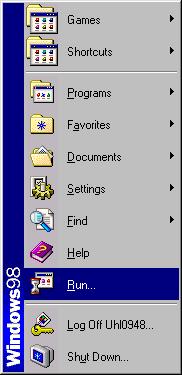
Compressing WAV FilesYou may be wondering why you would want to compress a WAV for Furcadia. The reason is that they can be large files that take up a lot of space. WAV files have good sound quality, but they can add download time to your dream. The answer to this large format is the MP3, but the problem with MP3s is that they do not play (are not compatible) in Furcadia. (Check here for a list of music extensions that are playable in dreams.) How can we solve this? We can compress wavs down to sizes that are one third, even less, than their MP3 counterpart. Have you ever wanted to play a real song in your dream, not just a MIDI? You can now. You can play full-length songs with vocals and everything! This page is dedicated to teaching you how compressed WAVs work and how to compress them. The first thing you need to do is see if your computer is able to play compressed wavs. Compressed wavs require your computer to be able to recognize MPEG Layer 3 files. This requires both a driver and a program (like Winamp). I have included the driver, if your computer does not have it already installed . All you need to do is download it and install it onto your computer. Here is a compressed wav for you to test. It is Timon and Pumba singing "The Lion Sleeps Tonight". Once you have verified that your computer is able to play compressed wavs, you're ready to move on to compressing your own WAVs for Furcadia. The very first thing you need to do is get a WAV that you wish to play in your dream. This will most likely be done by converting an MP3 to a WAV. You can do this by downloading an MP3 to WAV converter program. They have them all over the internet - you just need to look around. You'll notice that your 3-4 MB MP3 will turn into a 40+ MB WAV file. This is the reason why we need to compress them. You can't add a 40 MB WAV file to your dream, and even if you could, who would want to sit through a download that long? Once you have your wav, put it somewhere you'll remember, like your desktop for easy access. You now need to run the program that allows you to compress your WAV files. I have only ever done this on Windows 95 and Windows 98, so please tell me if it works on other Windows platforms. Click on the Start button on your taskbar and choose Run.
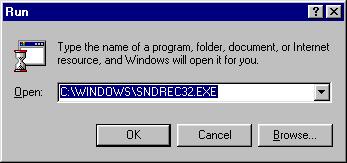
This will make a window appear, in which you should type C:\WINDOWS\SNDREC32.EXE inside and click the OK box. Some computers will not have this program, and if yours doesn't, I'm sorry. I'm not sure where you can get it, or if you can get it at all. I have noticed that the computers that were put together by people themselves are the ones that tend to not have it.
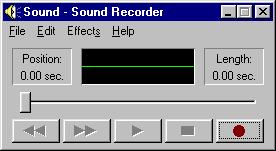
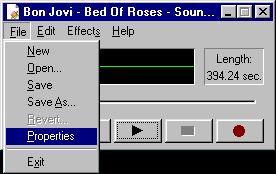
This is the Sound Recorder program that should appear. It is what you'll use to compress and save your WAV files. As you can see, it's not the most complicated of programs, so don't get worried.
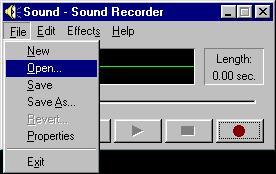
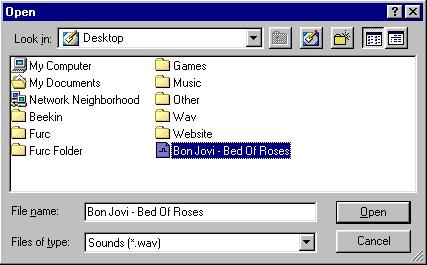
Go ahead and go to File and choose Open.
Now choose the WAV file that you want to compress. I chose Bon Jovi's "Bed of Roses." Once you have chosen your WAV file, press the Open button.
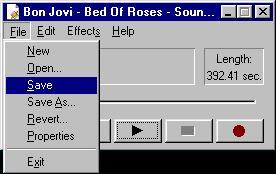
You'll now be back in the Sound Recorder screen, and your WAV will be loaded. You can now use the various play options, if you feel like listening to your WAV. When you're ready, go to File and choose Properties - it's time to compress your WAV.
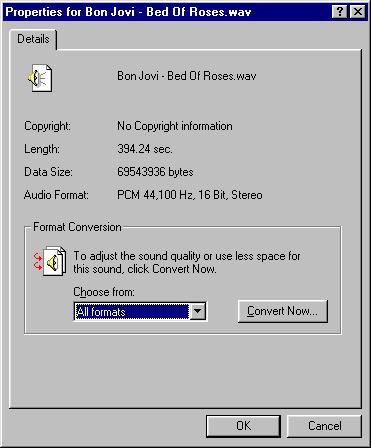
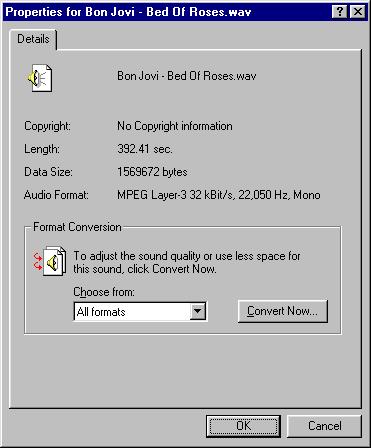
You should now be in the Properties window for the Sound Recorder. This is where you'll see various information about your wav. Notice that this WAV is currently 69.5 MB and is in PCM 44,100 Hz, 16 Bit, Stereo format. Click on the Convert Now button to change the information about your WAV.
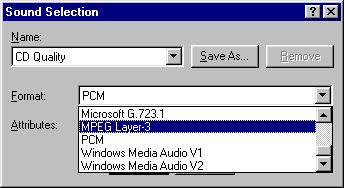
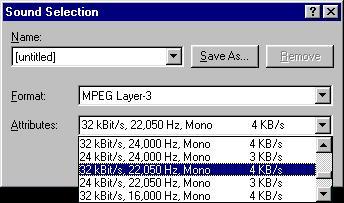
These next few steps are ones that you will only need to do once. You should now be in the Sound Selection window, and the default name that pops up for your WAV should be CD Quality. You want to create an MPEG name that will be saved in your Sound Recorder for future use. Since you have installed the MPEG driver on your computer, go down to the Format bar and choose MPEG Layer-3.
Notice that the name of your conversion type has changed to [untitled]. You now want to choose the compression rate for your WAV. Under the Attributes bar, choose 32 kBit/s, 22,050 Hz, Mono 4 KB/s.
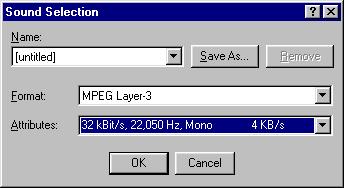
Once you have set the Format to MPEG Layer-3 and the Attributes to 32 kBit/s, 22,050 Hz, Mono 4 KB/s, you're read to save the new conversion type. Press the Save As button.
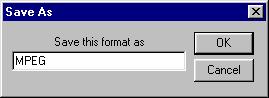
The Save As window will now pop up, and you want to type MPEG in the field given. Once you've done this, press the OK button.
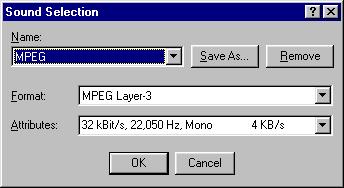
You should now be back in the Sound Selection window that you were just in. Your conversion information should be there, and the conversion name should be MPEG. From now on, whenever you run the Sound Recorder, you'll already have the MPEG conversion type added, so you do not need to do these steps again. When you're ready, press the OK button to start the actual conversion.
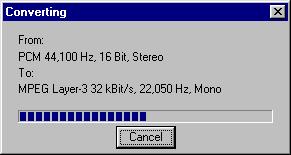
The actual conversion shouldn't take too long - it depends on the size of the WAV. You'll be shown a Converting window, so that you know the progress of the conversion. It'll tell you that it's converting from the PCM 44,100 Hz, 16 Bit, Stereo type to the MPEG Layer-3 32 kBit/s, 22,050 Hz, Mono type.
You should now be back in the Properties window for your WAV. Do you notice anything different? The size of the file is now only 1.5 MB and is MPEG Layer-3 32 kBit/s, 22,050 Hz, Mono type.
Click the OK button, and you'll be back in the original Sound Recorder screen. Go up to File and choose Save. Save your compressed wav as whatever you like, and you're done.
Well, there you have it.We were able to compress a 65 MB WAV into only 1.5 MB. That's even smaller than what it was as an MP3 (6.1 MB). The quality of the sound is not going to be as good as it was as an MP3 or full-size wav, but it's now small enough to be played in Furcadia. 1.5 MB is still pretty big for a file to put into a Furcadian patch, but I chose a rather long song (6 minutes and 32 seconds). I believe Furcadian dream patches are able to hold up to 2 MB of files, so 1.5 MB isn't too large. Most compressed songs should be around 800-900 KB in size.
 Beekin's Help Desk
|