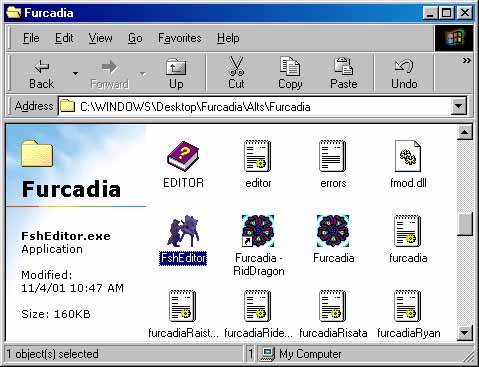
Using FSH Files and the FSHEditor.exeFshEditor.exe stands for Furcadia FSH Editor. This is the program that you use to customize the graphics that Furcadia uses for either private use or use in a dream. In order to begin customizing your graphics, start by going into your Furcadia folder and double-clicking on the file named FshEditor.exe. It should look like this:
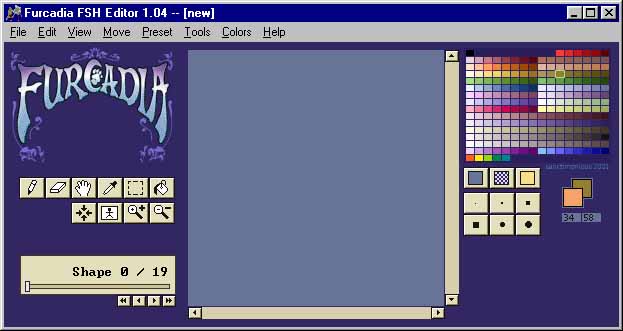
Double-clicking on FshEditor.exe will open up the Furcadia FSH Editor. This is where you will be doing all of the customizing of your graphics:
You can also press the button on Tab C of your Furcadia client to open up this program. That and other client options are described in better detail in the Furcadia.exe section of this guide. When you run the Furcadia FSH Editor, it loads up a default, empty .fsh file for you that has 20 slots for different graphics (numbered 0 through 19). Let me take this time to explain the different aspects of the Furcadia FSH Editor. This is probably the most involved and detailed program, so there is a lot to read and learn. Let's begin.
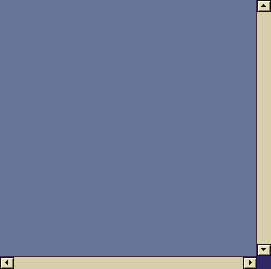
This is the Edit window that you'll be using the most. Here is where you will see the object that you're currently editing. Using the left mouse button will color using the left color you've specified. The right mouse button will color using the right color you've specified. Choosing colors is explained later on this page. If you have zoomed in, or are editing a very large graphic, then you can use the two scrollbars to change what part of the graphic you're looking at.
This is your Color window. This gives you all 256 colors that you're able to use to edit your graphics. Left-clicking on a color will set that to be the color you place when you use your left mouse button. Right-clicking on a color will set that to be the color you place when you use your right mouse button.
This portion of the Furcadia FSH Editor shows you the two colors you have selected for your left and right mouse buttons. The left color is on the left, and the right color, coincidentally enough, is on the right. The same applies to the numbers below the two colors. These tell you the number of the left and right color that you have selected.
These are your Tool buttons. Each one lets you do a different thing with the .fsh file that you're editing. Most of these will probably look familiar to you. Some of them may not. I'll explain each button individually now.
These are your Background and Size buttons. There will be times when you may want to use a different look for your transparent backgrounds and/or use a different size when coloring and erasing. Each button is explained below.
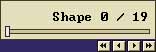
This is your Browse window. The number after "Shape" tells you which number you're editing. The second number, after the "/", tells you how many total graphics there are in this.fsh file. Remember that the first graphic is graphic 0, so there are actually 20 graphics in this .fsh file. The four buttons on the bottom help you navigate through the different graphics. The double left arrow moves you back 8 graphics, the single left arrow moves you back one graphic, the single right arrow moves you forward one graphic, and the double right arrow moves you forward 8 graphics.
Finally, let me explain the Menu Bar. This is standard on most applications, so you're probably familiar with it's appearance. Each option has various uses, so let me explain them all to you. File Menu: The File Menu gives you the standard options of New, Open, Save, Save As, and Exit. There are two other options, however, Import and Export. Import lets you import either a single picture, multiple pictures or a picture collage. Export lets you export a single picture as a .bmp. If you want to import a single picture, just make sure it's a .bmp file type and then use the Open window that appears to browse your computer for it. This will replace the current graphic you're editing with the graphic you imported.
If you want to import multiple files, make sure they're all named the same except for different numbers at the end (ex. Patch1.bmp, Patch2.bmp, Patch3.bmp). You then type in the name of the files, replacing the numbers with an asterix (ex. Patch*.bmp). The Import Definitions section determines how these pictures will be added. Will they replace old shapes, or add new shapes? And do you want them placed starting at the current shape, after the current shape, before the current shape, at the beginning, or at the end? The Misc section lets you choose if they'll have a transparent background applied to them and if you want them centered.
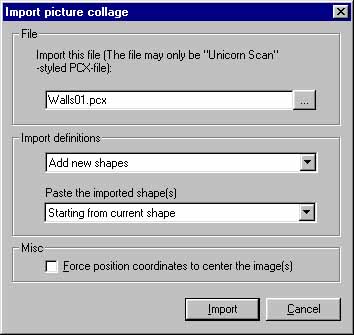
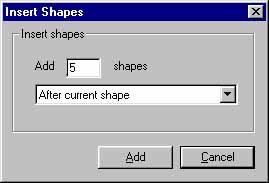
If you want to import a picture collage, then you need to make sure that the .pcx file you're about to import is one of the .pcx files that appear like they do in UnicornScan. If you don't have UnicornScan, or don't know what UnicornScan is, then this option should never be used. UnicornScan is an older patch making program. Browse for the .pcx file, and then use the above explanations for the other aspects of this window to decide on your choices. To export a picture as a .bmp, simply choose this option and type in the name that you want it to be saved as. Edit Menu: The Edit Menu offers you the standard Cut, Copy, Paste, Undo, Redo, and Select All options. You can also Flip your graphic Horizontally and Vertically. The Revert Shape From Last Saved Position choice will remove any changes you've made to the graphic since you last saved your .fsh file. The Forecolor To Backcolor option will change all parts of your graphic that have your selected left color and change them to your selected right color. This is useful for when you want to change all of one color in your graphic. You can also Remove the current Shape from your .fsh file, or Add more Shapes to your .fsh file, using the dialog box that's show below.
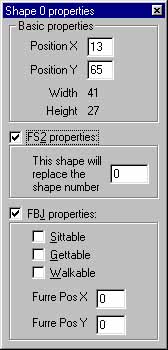
View Menu: The View Menu offers you a lot of really neat features for your .fsh editing. You can use the Jump Window option to change the graphic you're editing the graphic number you specify. You can choose the Show Grid While Zooming option to make a pixel grid appear when you're zoomed in to allow you the use of a grid while editing. The Shape Properties option pops up a dialog box that lets you edit the position of the object, the .fs2 properties, and the .fbj properties. Remember that if you change one of the .fbj properties, you need to change them all, otherwise all the rest of the objects in your .fsh file will be set to non-walkable and non-getable. This only applies to Item, Item2, and Iteme.fsh files, however.
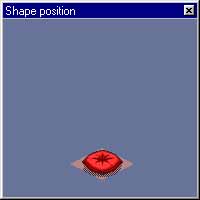
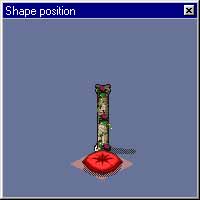
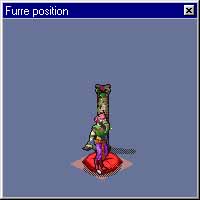
The Shape Position and Furre Position options let you choose where the shape will appear in respect to the tile you place it on and where a furre will be placed when they are placed on that object through either walking on top of it or through DragonSpeak. Again, remember if you change where the furre is positioned, however, you must change it for all the other objects, too, because of the way .fbj files work.
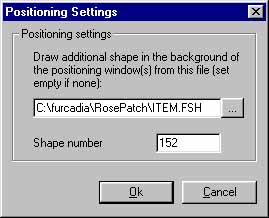
The Positioning Settings lets you place one additional object in the two position settings windows. Choosing this option will bring up a dialog box where you search for a .fsh file that has the object you wish to include in the view. You then put in the shape number of that object inside the .fsh file and press the Ok button.
Move Menu: The Move Menu offers you the four options/arrow keys that appear under the Browse window. Preset Menu: The Preset Menu is a menu for more advanced users. If you are wanting to use .fbj settings, you can use this tab to apply either one of the default .fjb settings, or one you've created, to the current .fsh file you're editing. If you're editing a .fs2 file, you can use the Set Default .FS2 Numbering option to reset the .fs2 shape settings to the default settings. Tools Menu: The Tools Menu lets you change your tools and sizes without actually having to press the buttons. Generally, I think pressing buttons are easier than going up to this tab, but you may feel differently. Colors Menu: The Colors Menu is a quick way to choose the type of color you're wanting to use. This is really only useful for when you're editing either portrait or player graphics, because those are the .fsh files that change depending on your color code. Help Menu: The Help Menu gives you all the standard help choices, including additional information about the FshEditor program. It's never a bad idea to read through such texts. Once you know what all the different aspects of the Furcadia FSH Editor are, it's easy to learn how to edit your own graphics. You'll be customizing your Furcadia appearance in no time. If you have any further questions about FSH Editor, please make sure that the information isn't found anywhere else in these guides and then feel free to contact the Beekin Helpers.
 Beekin's Help Desk
|