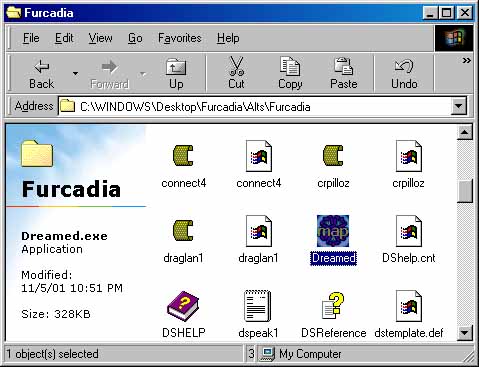
Make Your Dreams Come TrueDreamEd.exe stands for Furcadia Dream Editor. This is the program that you use to weave your very own dreams for Furcadia. "Dream" is the name given to your personal map in Furcadia, and "weaving" is the term used for creating those dreams. In order to begin weaving your dream, start by going into your Furcadia folder and double-clicking on the file named DreamEd.exe. It should look like this:
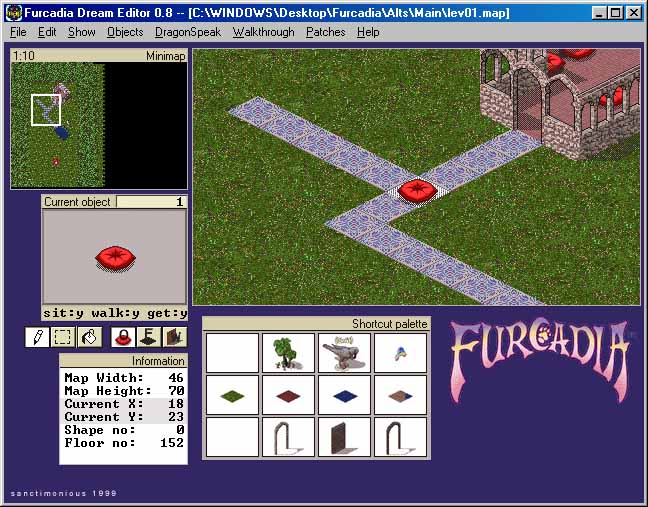
Double-clicking on DreamEd.exe will open up the Furcadia Dream Editor. This is where you will be doing all of the weaving for your dream:
You can also press the button on Tab C of your Furcadia client to open up this program. That and other client options are described in better detail in the Furcadia.exe section of this guide. When you run the Furcadia Dream Editor for the first time, it loads up a default map for you. This map is called lev01. If you have already ran the Furcadia Dream Editor before, it loads up the last map that you had open. This is handy, because you oftentimes want to work on the same map over the span of a few days, and this automatic feature saves you the trouble of having to open up the .map file each time. Coincidentally enough, .map are the file types for your dreams in Furcadia. All .map files in your Furcadia folder are assorted levels and maps that are used in Furcadia. I do not suggest that you ever edit these maps. Looking at them is fine, but it's probably not wise to save any changes you make, unless you are changing a copied version of the original map. If you do accidentally save over one of these maps, the changes you have made will appear for you, and you only, when you're playing Furcadia. If this is your first time using the Furcadia Dream Editor, you have quite a bit of new information thrown at you when you first look at the program you just opened. Let me take this time to explain each of the parts of the Furcadia Dream Editor. NOTE: The Furcadia Dream Editor, and other programs, have two definitions for objects. They say that objects are the shapes like pillows, cushions, paintings, trees and other non-wall/non-floor tile things you can place in your dream. I will be referring to these objects as shapes in this guide. The other definition for objects is the umbrella term to describe all floor tiles, objects (shapes, as I'll be calling them) and walls. To minimize confusion about the word object which encompasses many things, we'll change the first definition from objects to shapes.
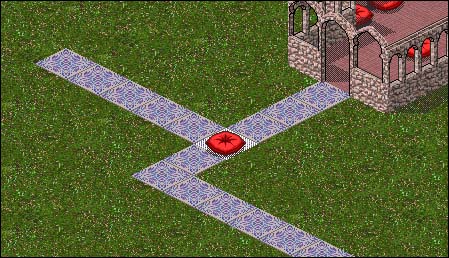
This is the Edit window that you'll be using the most. Here is where you can place floor tiles, shapes, and walls. Your cursor in this window is designated by a transparent-white "square". The floor tile, shape, or wall appears on this cursor, so that you can see how it will look before it's placed on the map. Moving your cursor to the edge of this window will scroll you in that direction. To place a floor tile, shape, or wall, simply left-click on the position you wish to place it. You can also use your Spacebar. Left-clicking on a floor tile, shape, or wall will select it, so that you're now "holding" that in your cursor. Let me give you an example. Say you're currently placing red pillows. If you were to move your cursor (which shows a red pillow on it) over a blue pillow and were to press either the Spacebar or left-click, you would place down a red pillow and remove the blue one. If you were to right-click over the blue pillow, your cursor would change from having a red pillow on it to having a blue pillow on it (meaning that you're now placing blue pillows when you left-click or press the Spacebar). I hope I didn't make that sound too confusing, because right-clicking is a great way to save time when you want to place a certain floor tile, shape, or wall and you already have one of those floor tiles, shapes, or walls on your map. Otherwise you'd have to cycle through all of the appropriate groups types in order to find the certain one you want to place down on the map.
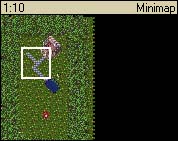
This is your Minimap window. It shows a reduced picture of your map. The white box shows you what part of your map you're currently looking at in the Edit window. A fast way to move around your map and edit different areas is to left-click on the minimap and drag the white box over to the part of the map you wish to edit. A normal left-click will move the white box over the spot you clicked.
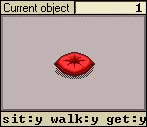
This is your Current Object window. It shows you a picture of the floor tile, shape, or wall you currently are placing (holding in your cursor), and it gives you the object number of that floor tile, shape, or wall. This is important for when you're using DragonSpeak, which is explained in great depth in another section of this guide. You'll often see Sit: Walk: and Get: at the bottom of this window. These three things are followed by either an N or a Y. The N and Y stand for No and Yes respectively, and so this information tells you if your furre automatically sits on these shapes, if they can walk on these objects, and if they can get (pick up) these objects. The same applies for floor tiles and walls, though the walls currently are a bit buggy, and you can actually walk through a few walls that say you can't. You can walk through walls 2, 3, 14, and 15. By left-clicking on this window with the red pillow, a larger window appears that shows you a small version of all the types of shapes. If a wall or floor was in this window, the larger window would feature smaller versions of either walls or floors. Floor tiles and walls only have one window of pictures, but the shapes have three windows of pictures. At the bottom it says to press [SPACE] for the next page. They mean for you to press the Spacebar. These large windows with pictures are handy, because it allows you to choose objects quickly, without having to scroll through all of them one-by-one.
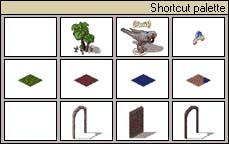
This is your Shortcut Palette window. It shows you a few pre-defined shapes, floor tiles, and walls that you can press and start placing automatically. Not a whole lot to explain about this one.
These are your Tool buttons. The three left buttons deal with the three different ways you can place down objects, while the three buttons on the right deal with the three different types of objects. The three left buttons are a Pencil, an Area, and the Bucket. These may sound familiar to you. The Pencil is what you will use the most, and it's the default tool chosen. When you use this tool, you will only place one floor tile, shape, or wall at a time. The Area tool is a bit tricky. With this tool, you left-click and drag the cursor. In doing this, you'll create a "rectangle". Pressing the Spacebar will then fill that rectangle with the floor tile, shape, or wall that's in your Current Object window. The Bucket tool is good for when you want to fill a large area with the same type of floor tile, shape, or wall. Left-click in the area that you want to fill and this tool will fill it for you. Be forewarned, however. Using this tool may sometimes crash the Furcadia Dream Editor. Always save your map before using this tool. I learned the hard way. The three right buttons let you choose between shapes, floor tiles, and walls respectively. If the pictures confuse you, just remember that the O stands for Objects (shapes, as we refer to them in this guide), the F stands for Floors, and the W stands for Walls.
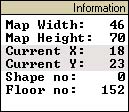
This is your Information window. This window holds a lot of useful information for you. It tells you the total width and height of your map. It also tells you the coordinate of your cursor, which is very handy for when you want to use DragonSpeak. The last two lines of information tell you the number of the shape and floor that are at the position. Just so you know, shape 0 is an actual shape, it is just invisible, and floor tile 0 is the default grass tile. Those are all the windows that you'll be dealing with in the Furcadia Dream Editor. So far, however, I've explained things only in terms of the mouse and clicking. let me take this time to explain some of the keyboard shortcuts and tricks. Brackets ([]'s) surrounding a word or letter means that it's what you press to activate this action. You do not need to hold down the Shift key for any of these. I simply showed them in capitals and Shift form for easier recognition.
You'll find some of those useful, and others you'll find not useful. You'll ultimately figure out your style for dream editing. I'm simply showing you the different avenues you have to do so. You want to find what works best for you. Finally, let me explain the Menu Bar. This is standard on most applications, so you're probably familiar with it's appearance. Each option has various uses, so let me explain them all to you.
File Menu: The File Menu gives you the standard options of New, Open, Save, Save As and Exit. There is another option, however, and this option lets you save your map as a bitmap image. (.bmp) People use this option to make small maps of their dream for websites and other assorted uses. Edit Menu: The Edit Menu offers you the standard Copy, Paste and Undo options. You can also use this menu to change the size of your map. It is generally a good idea to do this before you start working on your map. I always extend it out to the largest size possible no matter how large I feel the dream is going to be. It really won't affect how long of a download you have for your dream, or anything like that. Show Menu: The Show Menu pretty much deals entirely with how the Furcadia Dream Editor makes your maps appear. The first three options start off checked and determine what shows up in your dream editor. Turning either the floor tiles, shapes, or walls off won't remove them from your dream, it just hides them from view in the Furcadia Dream Editor. The Current Object At Map option determines if the current object you're placing shows up on your white "square" cursor. The Show Walking Borders option determines if you see the red edges of the map where a furre can't walk in the Furcadia Dream Editor (the red part won't show when you actually upload your dream to Furcadia). The Highlight option gives you three choices on how your cursor shows up. The Minimap option gives you three choices on how your minimap appears. The Auto Scroll option determines if moving your cursor to the edge of the Edit window will scroll you in that direction. The Show Command Keys option brings up a dialog box with all of the keyboard keys that I listed above and a few extra. Object Menu: The Object Menu lets you look at a list of different shape objects. You choose one of these, and then that will be the shape that you're now placing. I find clicking on the picture of the object to bring up the windows of all the pictures easier, so I never use this menu at all. DragonSpeak Menu: The DragonSpeak Menu gives you the two choices you have for adding DragonSpeak to your dream. The Notepad option lets you edit your DragonSpeak using Notepad, while the VisualDS options allows you to edit your DragonSpeak using the VisualDS program. DragonSpeak is explained in the next section of this guide, so I won't go into it here. Walkthrough Menu: The Walkthrough Menu allows you to run the Furcadia Dream Editor walkthrough, which is a way to test your DragonSpeak and get a feel for how your dream will work without actually having to load it to the Furcadia server to test. The walkthrough is currently not in working order, however, and most likely will work for you, but have some bugs. A new walkthrough program will be created and added to the Furcadia Dream Editor at a later date. Patches Menu: The Patches Menu gives you two choices. If you want to add a patch to your dream, you click on the Dream Settings choice. If you want to see a change that you just made to the patch that's already connected to your dream, you can choose the Reload Patch option. Patches, and how to attach them to your dream, are explained in a later section of this guide. Help Menu: The Help Menu gives you all the standard help choices, including additional information about the DreamEd program and DragonSpeak. It it well worth your time to read through both of those if you have a specific question about Dream Weaving and Dragon Speak. Once you know what all the different aspects of the Furcadia Dream Editor are, it's not that hard of a program to use. You'll pick up the art of Dream Weaving pretty fast. It's a really fun thing to do. Many furres in Furcadia have their own homes, cities, and even castles. I'm sure you'll think of a good use for the dream editor, too. If you have any further questions about the DreamEd, please make sure that the information isn't found anywhere else in these guides and then feel free to contact the Beekin Helpers.
 Beekin's Help Desk
|