
Regions explained:
What they are, what they do and why you don't need a passport
The latest Furcadia update at the time of writing (v29) has bought some awesome new features to the creative Furcadia community. Top of that list is Effects and Regions, new ways to do amazing things in your dreams. And they truly are some exciting stuff to play with. I know a lot of guides are likely to be published about the amazing animated effects, but what about us code-junkies? What have we got to savour? Regions.. a brand new way of organising, dividing and controlling your map and dream layout. It might not sound exciting, but let me just run a few facts past you....
- Regions will allow you to build rooms right next to each other on the map, and hide one room from the view of players in the other. No more massive black spaces on maps!
- Regions can be used to track players, control where in a dream an object can be placed (or not), where effects will happen, or indeed, to make a certain place inaccessible.. all without tons and tons of DS lines.
- Regions can be used to dynamically change certain areas of the map. Want it to only rain outdoors? Or for an earthquake to destroy the temple's high altar? Regions will make these things possible and easier than ever before.
- They can be changed while the dream is loaded, moved around, added or removed via DS. They can even be used with live-edit!
- They can be spread all over the map. Regions are not confined to one continuous space.
In this guide, I hope to guide you around some of the fundamentals and of course - some practical uses for 'Regions'. What are they? What do they do? How is this such a powerful tool? Well, never fear. Your faithful demonic friend is here to guide you around the sinister and strange world of Regions.
Sinister Planning and Plotting:
The way to get regions into your dreams
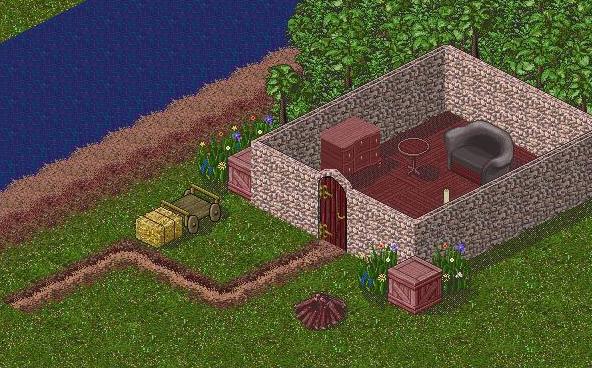
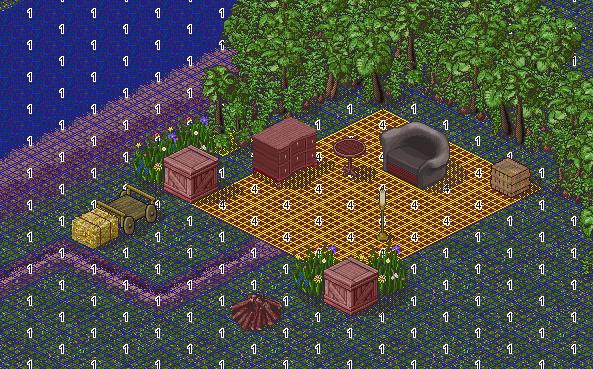
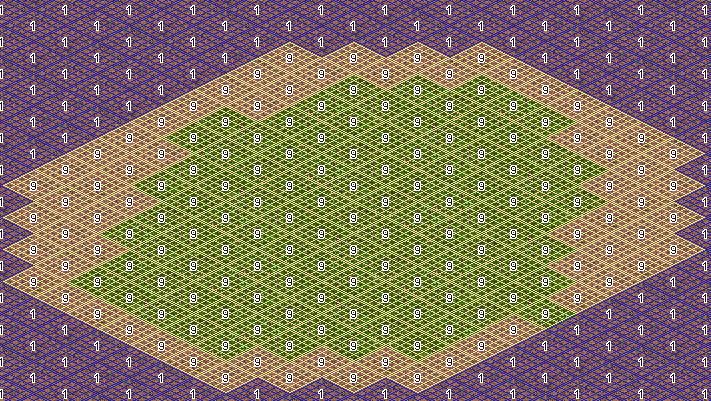
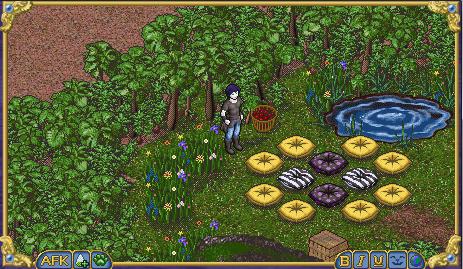
Regions are mapped out using the Dream Editor program supplied with Furcadia. So, of course to start showing you regions, we must first make a simple dream. I've made a couple of screenshots below to help you. We'll make a house with a single room, in a nice garden. Nothing too fancy, it's only an example of course! (If you're not too sure how to go about making floors, walls and objects yet, you might be best checking out my Beginners guide to Dreamweaving, available on Furresphere.net) Of course you can use regions in your existing dreams and maps too. But for this tutorial, we'll start from scratch.
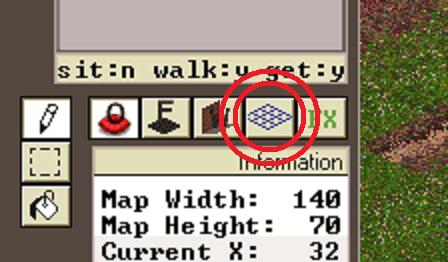
And that's the bit we know already. What about these regions, hm? Well, first you'll want to click the 'region' tool in the dream editor toolkit. It's highlighted in the next screenshot below to help you.
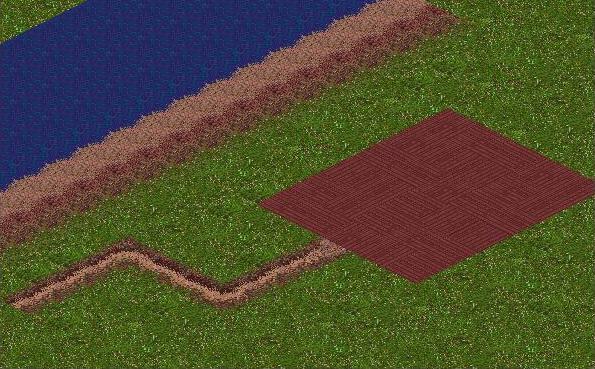
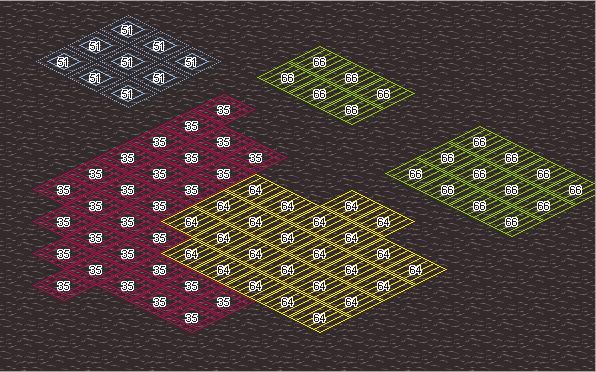
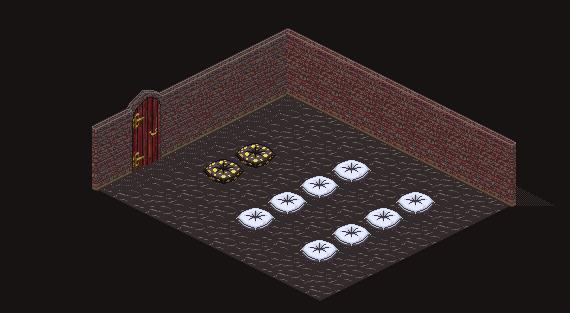
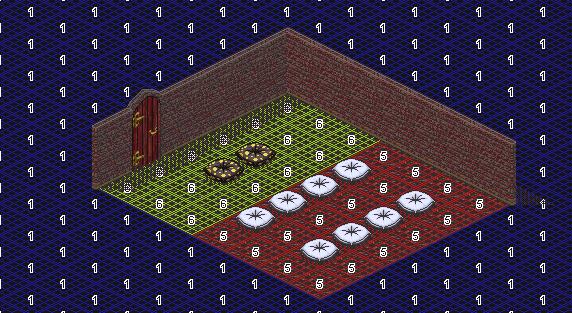
Regions can be laid out all over the place, in a similar way as floors. They can be in any shape or size, not just rectangles. And they don't even need to be all in one place! We can put the same region scattered all over the map, if we want to! See the second screenshot for an example of that. However, in this case, we'll use 2 regions. I'm going to use region 1 for my outdoors garden, and region 4 for my indoors 1-room house. There's a reason why I picked these numbers, you'll see in a moment. Check out my third and fourth screenshots below to see what I've done.
Also, you can flood-fill an area with regions with the flood-fill tool, like like objects and floors. Remember, it will flood-fill the entire area.. and it's easy to slip-up. Use 'Edit' - 'Undo' menu items (or CTRL+Z) to undo your mistakes.
Simple so far huh? Now each of these parts of the dream are set as regions. Before we go any further, lets just show you a couple of things. First, if the regions are sort of 'in your way' you can hide them, just like you can with objects, walls and floors. Go to the 'Show' menu at the top of the dream editor and uncheck 'Regions'. Or press CTRL+4 on the keyboard - a handy shortcut. Simply do the same again to restore them into your view. Also, notice that regions can be selected with a right-click, or filled with the fill tool - just like objects and floors. There has also been a little addition to the left side of Dream Editor... it will now tell you the region number of the selected location, even if regions are currently hidden in your view


Regions are simple things to put in any dream. That's not to say good planning isn't a good idea. Think about what you actually will be using regions for - might want to read the rest of this guide for ideas first. When you have a good idea what you will use this marvellous feature for, it will be much simpler to know how many regions you might need, where to place them and so on. It's not rocket science to put them in a dream at all, and its not hard to have a good plan. After all, you already made the rooms and decorated them, right? That's planning too!
When you're happy that you know your way around, lets move on to the next section, making regions 'work' and actually do something!
Outside and Inside:
Using Regions to divide your dream into rooms
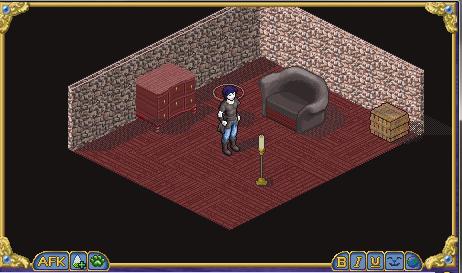
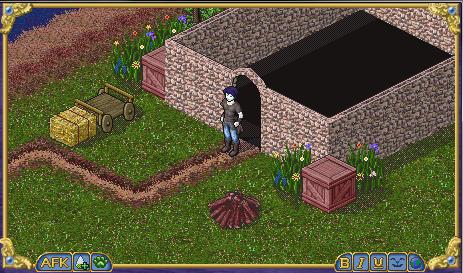
So we have a house, with a door. Now how about we make the 'inside' of the house a private place, separate from the outside world, huh? Yep. I mentioned this earlier. Using regions we can hide the outside world when we walk into our little cottage, giving us privacy. And indeed, one 'inside' region is hidden from others. Hidden regions cannot be seen in the viewer, nor can you hear any player in a region hidden from view. And no, they can't see or hear you either - even if on the map you're actually in the squares next to each other. Regions:- The end to massive black spaces between rooms on your map.
OK, lets get some action happening. We now need to write some Dragonspeak to make this stuff work. Open up your DS Editor from the Dragonspeak Menu (or press 'D') to begin.
The first bit of DS we'll need is the Furre arrival code - which should already be there. Make sure your Furres are arriving in the right place, by altering the X,Y co-ordinates appropriately. If you don't understand what that means, maybe you should check my Beginners tutorial for a reminder.
(5:15) move the triggering furre to (36,30), or to someplace nearby if it's occupied.
Now, lets make the regions DS. First we'll add a setting for when the dream is first loaded to declare that regions 1,2 and 3 are 'outside' and regions 4 and above are 'inside'. We'll also choose to hide walls between the 'inside' and 'outside' regions..
(5:122) treat all regions numbered 4 and higher as 'indoors', and only show furres there what's in that region.
(5:125) show bottom walls outdoors only.
What does this mean? Simple!
- Players in 'outside' regions can see other outside regions, but not inside ones. So you can mark several regions as 'outside' and use multiple regions in one place without hiding anything.
- Players in 'inside' regions can only see the region they are in, and no other. So your inside rooms remain totally private from each other, as well as from the 'outside'
If you haven't made any regions, or you're using a dream without regions, don't worry. Nothing is going to 'break'. Furcadia has traditionally treated all regions as if they were all 'outdoors', and so that is the default on any map that is not using regions. It will all act like it's 'outdoors'.
Now we're all set to witness the awesome power of regions. Save your DS file and dream map, and upload in a nice quiet spot somewhere. When you wander inside the house, you'll see that the outside 'disappears' from view! And when you are outside, you can't see, nor hear what's going on inside. See the below screenies to see what I mean....
Pro tips:
For more complex dreams, you might want to use multiple regions in one 'room'. If you followed the rest of this guide, you'll find out that multiple regions in one room can be used to great effect.
Currently there is no way to show a certain 'set' of indoor regions all at once. If you make a room with multiple indoor regions, the regions you are not standing in will disappear. All is not lost, however. You can use multiple 'outdoor' regions just fine, and they will be able to see each other. Think of it like this:
- 'Outdoor' regions are for your multi region rooms - even those that are supposed to be inside a building. With outdoor regions, you can use the silence and blocking effects; as mentioned in previous sections. But you have to place these rooms away from any other place they should not be able to 'see' - just like how dreams have always been done until now.
- 'Indoor' regions can be used for secret places and private rooms, that do not need multiple regions in one room. These can be placed anywhere on the map, you won't see them in outdoor or other indoor regions. But you lose the ability to use multiple regions in one place.
Good map planning tip - Put 'indoor' hidden rooms in all that empty space between your 'outdoor' rooms. They'll still be hidden, and the space isn't wasted!
It's a Secret!
Masking hidden areas in your dream with regions
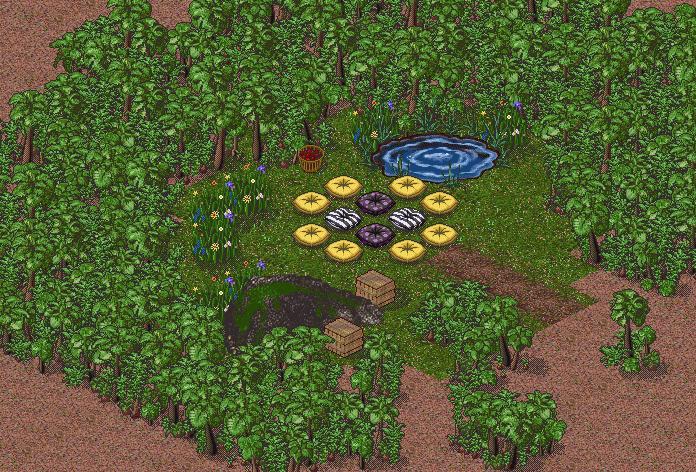
Yasabu Decimus is lost in the desert. Luckily for him, he found an oasis, with a good stock of food and water. But how can he protect himself from the fierce desert raider gangs of Bugges? Well, with regions, his secret hideaway can be a reality!
First, I'll draw a little map of an oasis in the desert, starting with the floors and a few items. This will be Yasa's hidden hideaway. I've started with just the floors to keep it simple and to be able to see what I'm doing. You can see the steps I'm following in the screenshots below. After I'm happy with the floors and items, I'll turn 'on' the view of regions. I shall make an area around and including my oasis region number '9'. I've included the area around my oasis floors to help merge the masking effect well, not to mention its yet another way to show you that regions can be any shape or size, and don't have to correlate with the floor tiles you've mapped.
After I've planned out my region, I'll add random jungle trees around my oasis to make border, of sorts. Make sure you leave a doorway into this hidden place, or it's a bit pointless! The finished layout is in the third screenshot.
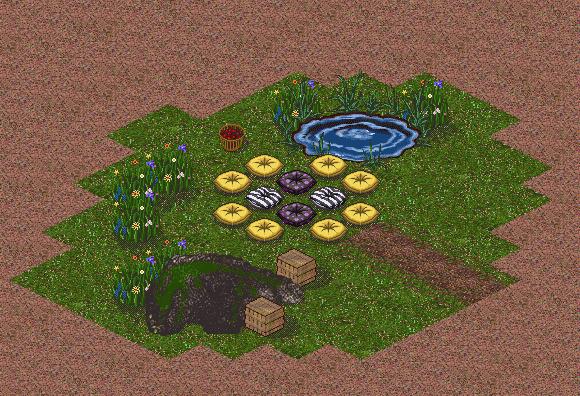
The effect we want to achieve is to mask 'region 9' with jungle trees, so from the outside, it will merely look like a mass of jungle. However, clever Yasa will know the secret way in to a hidden oasis within. Upon entering, the place will act like any other indoor area - masking away the outside world - but instead of blackness, it will show the desert sand.
The code we need to do this is merely 2 lines added to the code from the previous example (on the previos section). The lines I have added are the bottom two lines.
(5:122) treat all regions numbered 4 and higher as 'indoors', and only show furres there what's in that region.
(5:125) show bottom walls outdoors only.
(5:144) show object 128 in indoor regions where objects are hidden, instead of what's really there.
(5:142) show floor 120 in outdoor regions where floors are hidden, instead of what's really there.
These two lines will replace the 'blackness' or void that our first test dream showed, with objects or floors instead. There is similar DS lines for effects and walls too, and you can use a combination, or indeed - everything. However, you still will not see players, hear them in the other region, or indeed, see whats 'really there'.
Lets test it out....
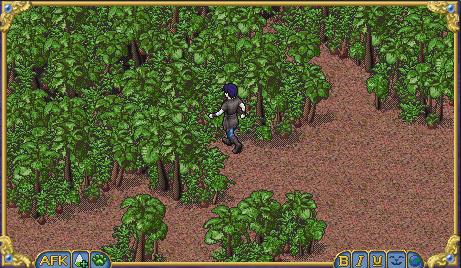
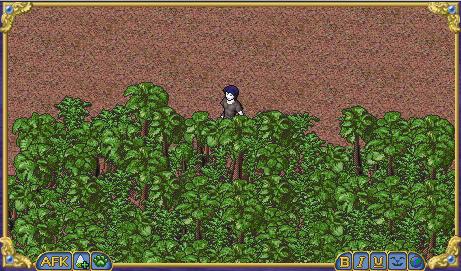
Voila! Yasa's secret hideaway in the desert sands. Hope he likes it.
Lets look at some other uses for regions, rather than just hiding and masking areas. They can do so much more...
Silence!
Using regions to make silent areas in your dream, or to silence a single player
Lets look at another quick and easy way to use regions to great effect. Perhaps we have a classroom for Ms Rei-Jin, but those rowdy furlings just will not stay quiet. Hmm. What we need here is region DS, coupled with Silence DS lines to make a 'quiet' area - giving Ms Rei-Jin a chance to teach her lesson.
For this example, we have another little room prepared. This one however, has multiple regions in it. We are using region '5' for the class, and region '6' for the front of the class. What we want to do here is make region '5' a silent region, so the furlings here cannot speak and scream during class. (They may still throw things and wield pea-shooters, however).
(5:212) set silent speech prefix (for spoken commands) to {!}
(0:31) When a furre says {!silenceclass},
(1:11) and the triggering furre has got shared control (or is the dream owner),
(5:160) set region 5 to silent (furres can't speak there).
(0:31) When a furre says {!classdismissed},
(1:11) and the triggering furre has got shared control (or is the dream owner),
(5:161) allow furres to talk in region 5.
As you can see, we've added 2 commands for anyone with 'share' control in the dream. They can use them to make region 5 a 'silent' area, or restore speech in the area. Very very simple technique, much simpler than the older ways to accomplish this. And Ms. Rei Jin will be so pleased too!
Trespasser beware:
Blocking access with regions
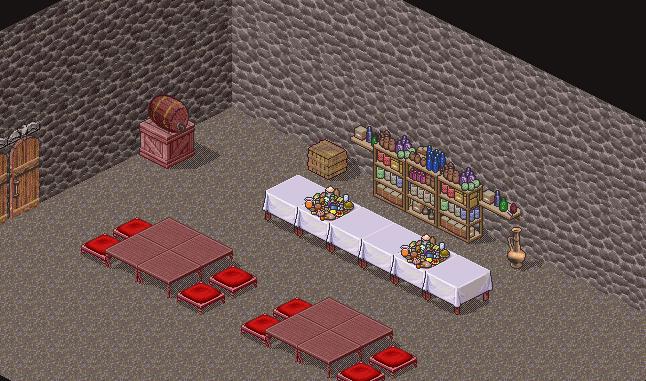
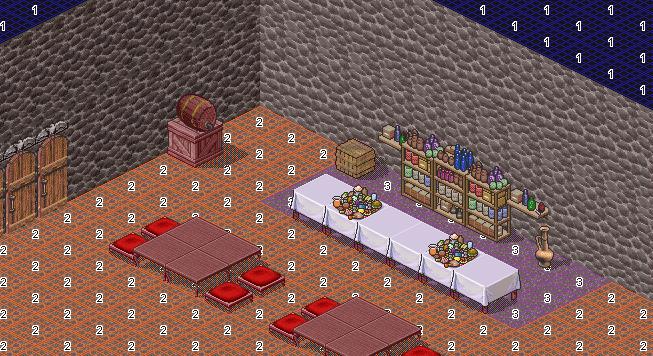
A much similar technique can be used to prevent unauthorised access to your staff-only or private places. In the example below, I have a little dining room for Emerald Flame's annual nutroast festival, but only staff (those with 'share' access, in our case) should be allowed to serve the patrons. After all, there's Health and Safety to think of!
Again, two regions in the same room. One for the majority of the room (region 2) and one for the area we want to block access to (region 3). Of course, the beauty of this code is it can be used in other rooms as well without having to use up more region numbers. Make the kitchen and the staff room 'region 3' as well, and this DS will apply to those places also. No sneaking off with Emmie's pumpkin pies!
(1:83) and the spot they moved to is in region 3,
(5:18) move the triggering furre back where they came from.
(5:200) emit message {[Hey. Get yer grubby paws out of my kitchen!]} to the triggering furre.
Nice and simple once again, it's not hard to see how this works. Notice the command is looking for people WITHOUT share.. don't confuse that with the line 'with' share or you'll get locked out of your own staff regions. Oh dear.
If you don't use 'share' to determine staff, no problem. Just alter the line '(1:111)' above as it suits you, whether that is for a Phoenixspeak check or checking someones entry-code. It still works with those methods too!
On the next sections; I'll be covering some more 'advanced' usages of regions. Nothing super hard, don't worry, but I left these till last so you'd have a good idea before I started confusing you. Walk on, if you dare!
Pro tips:You can change regions while the dream is loaded with DS. So you can easily make code to lay down region '3' squares upon command. Emmie can save her seat from meddlesome furres who want to steal it. Or indeed, you could turn the 'block' area off when the dining room is not in use - or block the whole room to close it for the night.
You could even combine silence and block regions. The classroom example could use blocking regions to stop naughty furlings from stealing pencils after class.
There's more than just these two lines in the new region DS added with the update. You can also stop objects being picked up or dropped in a region, allow summoning, leading and joining (or prohibit it) in a region, make it impossible to lie or sit in a region....... and all of these are easily adapted from the above 2 examples.
Where's Gar?:
Using regions to track staff, add staff chat and more
Bigger dreams, such as Taverns, Build-a-Homes and clubs might find a better use for regions in tracking players, such as their staff. Or incorporating an easy-to-make staff chat channel. There are ways to do this already, using message DS usually. But these methods can be confusing or complex for some. What we will attempt here is to use regions to track staff and provide some awesome functions for bigger dreams, instead of using them for 'zoning' out rooms. This would be an excellent way to make use of regions in areas that have already been mapped and made. While regions can hide rooms and other such fun, you'd basically end up remaking your entire map to take full advantage of such a feature. This might be a better use for the existing groups and guilds out there....A brief note of warning here however. What we are going to do is make a region 'follow' a staff player. Of course, this means that as he or she walks about, they could corrupt regions you have already placed down in the dream. If you want to use regions for lots of purposes, you might want to review this code before you just 'stick it in'. It's merely a quick, easy example, not necessarily the best method.
For our example, we'll reuse the map I made of Emmie's kitchen. Emmie has a kitchen boy named Gar, but he's a lazy so and so - so we're going to use regions to be able to track him down and find out where he's gone to sleep when he should be working. Unlike the first example with this map, I will not place any regions down just yet. Instead of assigning regions to rooms or areas in Dream Editor, we'll make some DS that can place a region upon Gar, and follow him as he moves about.
First, a bit of DS to follow Gar as he wanders through the dream, placing region 100 under him as he moves from place to place, and erasing the region from the place he just left. We use region 100, but it is important to make sure this is an outdoor region... if it was an indoor region then Gar won't be able to see anything around him, cause it would be hidden! And then he'd never do the dishes - he can't see them!
(3:5) where the triggering furre moved from,
(5:120) make this/these location(s) part of region 0.
(3:6) where the triggering furre moved into,
(5:120) make this/these location(s) part of region 100
Then of course, we'd need to account for Gar arriving and leaving the dream too. Notice how we use slightly different code to determine the correct location to place the region. This is to account for the way that dreams operate on arrivals and departures.
(1:70) and the triggering furre's name is {Gar},
(5:350) set variable %GarIsHere to the X,Y position the triggering furre (moved from/is standing at).
(5:121) make location (%GarIsHere) part of region 100.
(0:10) When a furre leaves the dream,
(1:70) and the triggering furre's name is {Gar},
(5:350) set variable %GarIsHere to the X,Y position the triggering furre (moved from/is standing at).
(5:121) make location (%GarIsHere) part of region 0.
Now we can add a command to locate Gar. Ironically, this doesn't use region DS at all, but hey, we'll add it anyway, right?
(1:70) and the triggering furre's name is {Emerald|Flame},
(5:56) make the furre named {Gar} the new triggering furre, if they're in the dream right now.
(5:350) set variable %GarIsHere to the X,Y position the triggering furre (moved from/is standing at).
(5:205) emit message {Gar is at %GarIsHere.x,%GarIsHere.y} to the furre named {Emerald|Flame} if they're in the dream.
But what we can use the regions for - tracking Gar down to send him a wake up call. With region DS we can search for the region Gar is in, and emit a message to him. As region 100 is his own personal region, only he will see the message Emmie writes. Note the use of message DS here. It records what Emmie says, removes the command word from it, then relays it to Gar in his own little region world.
(1:70) and the triggering furre's name is {Emerald|Flame},
(5:255) set message ~GarMessage to what the triggering furre just said or emoted.
(5:278) remove the first 1 copies of {!tellgar} from message ~GarMessage.
(3:30) in region 100,
(4:30) only in region 100,
(5:201) emit message {~GarMessage - From Emerald Flame.} to any furre present.
And there we have it. A private, dream-wide chat channel from Emmie to Gar. You could replicate this code to make more channels for other people, each would need their own region. Or you could make a channel for a group of people with a few edits here and there. I'll post some more examples on the site a bit later.
Good luck, and happy dreaming!
- Sample Dreams
- Mason's Knowledgebase
- Custom Walls
- The Pixels
- Patches Archive
- Site Redesign
- Talzhemir's Art
- Creation Talks

This page, subsequent pages and all content therein, unless otherwise stated is copyright © Dragon's Eye Productions. Site maintained by The Beekin Scribes.